Loading...

Pol Recasens Sarrà

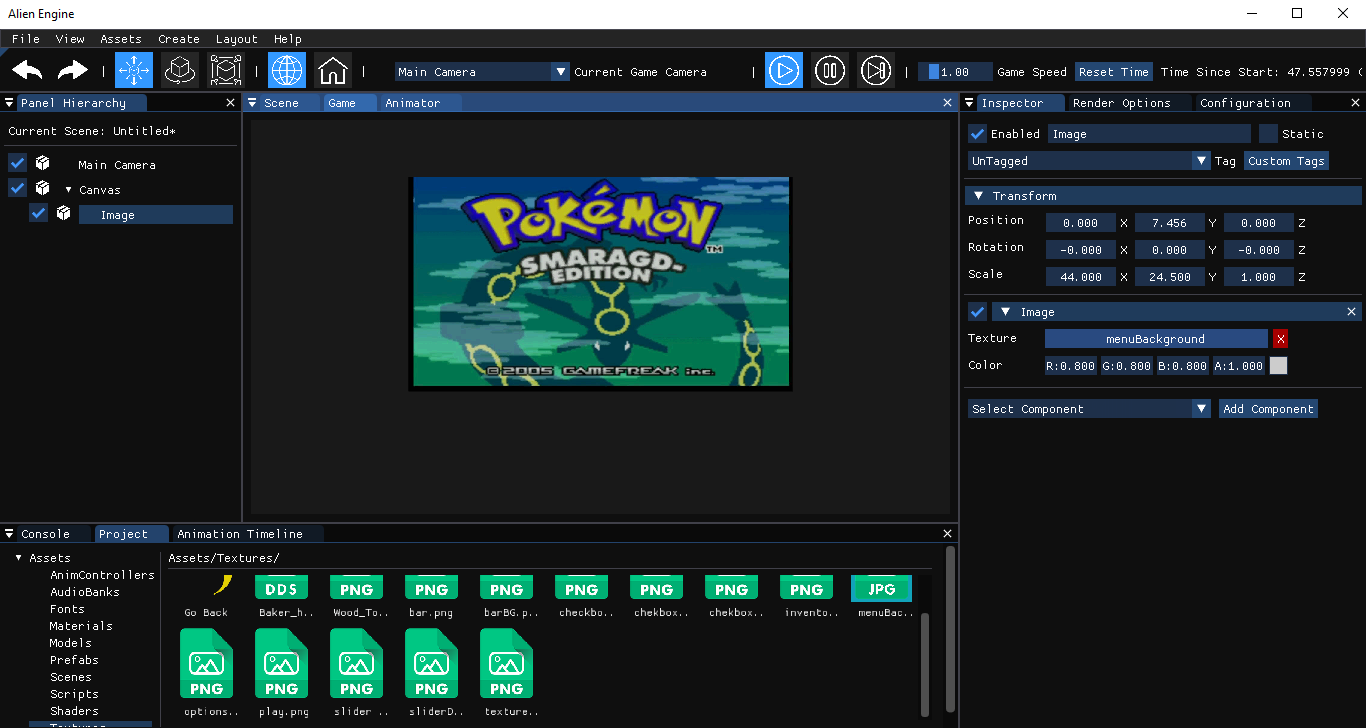
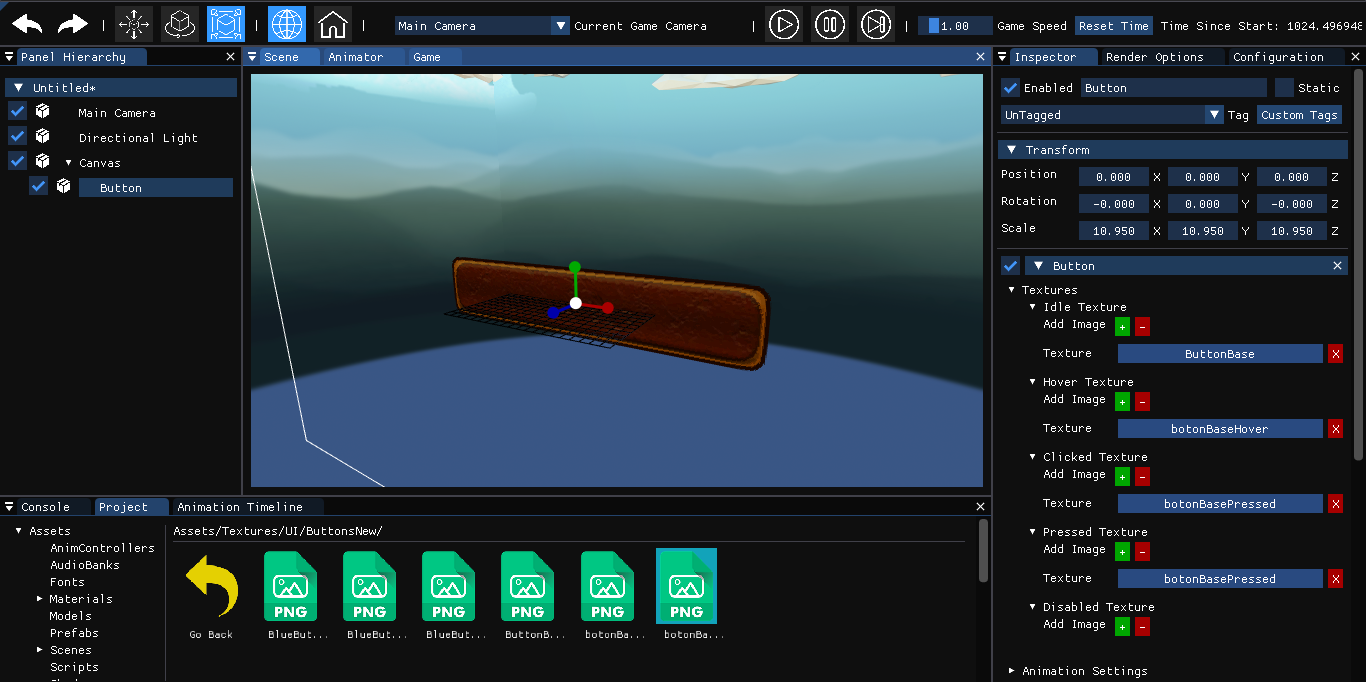
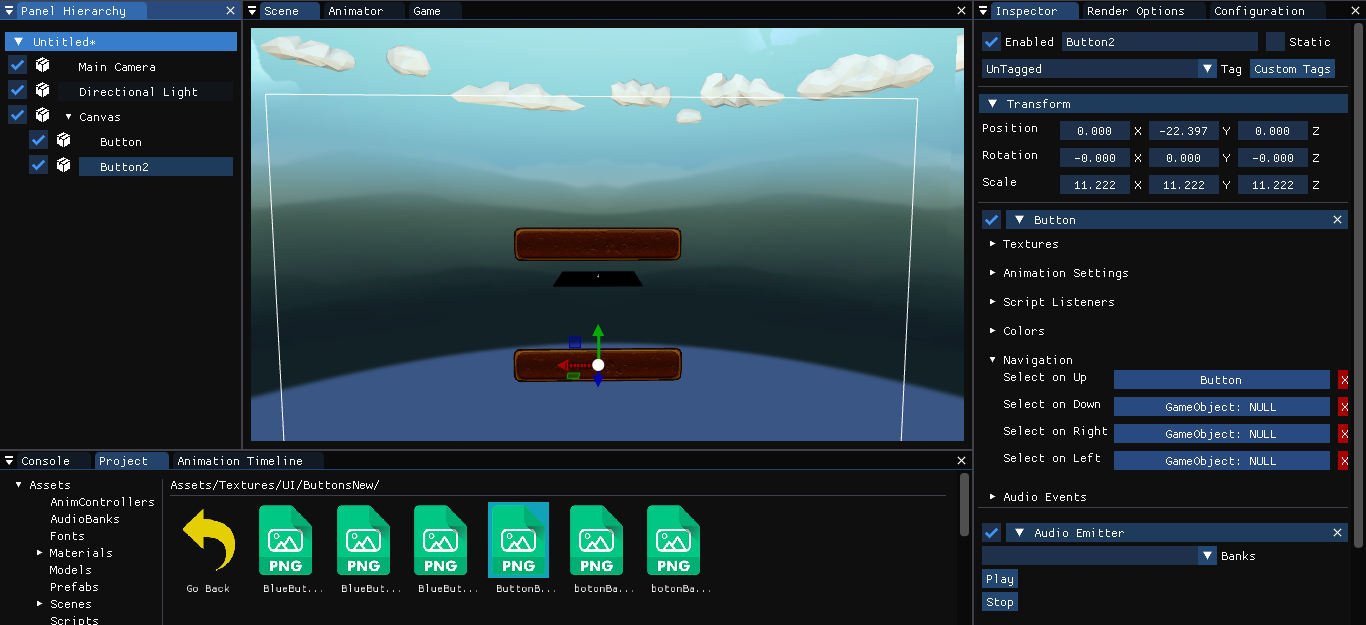
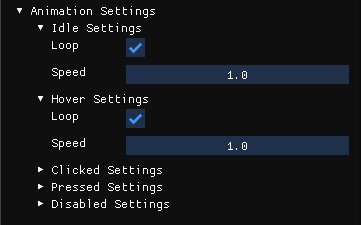
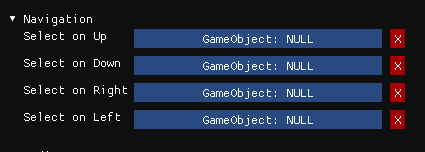
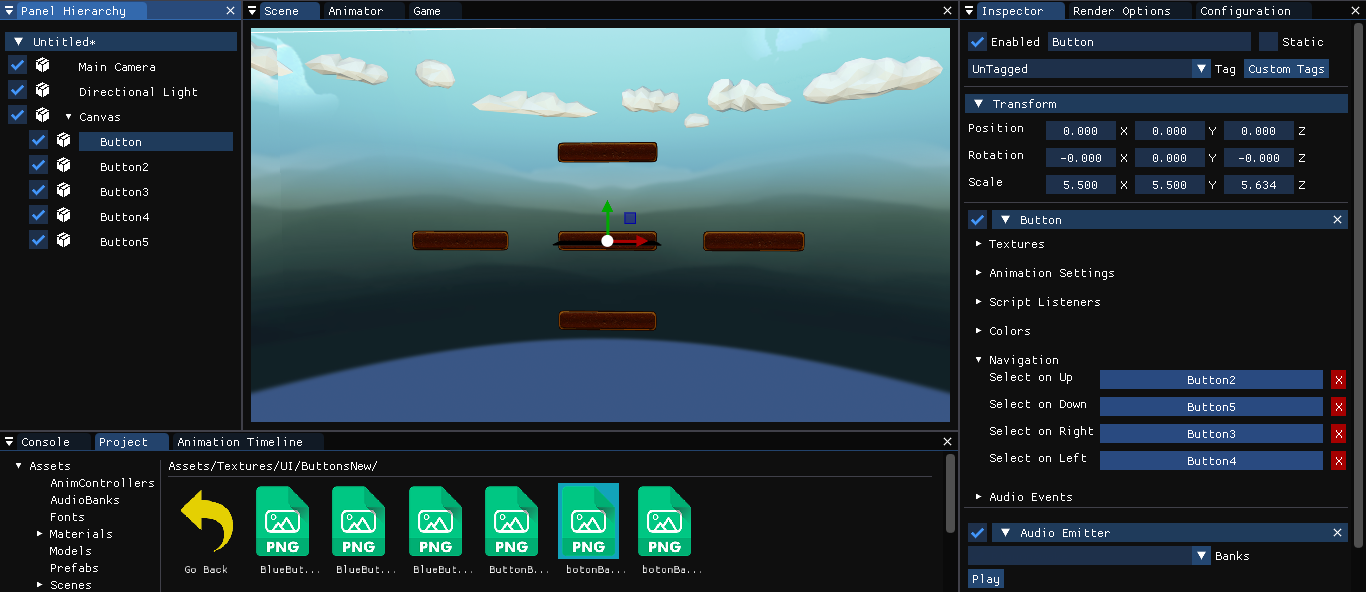
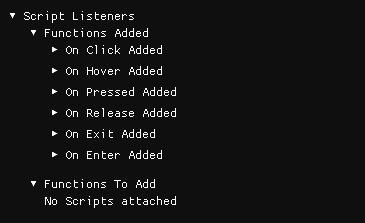
Does the UI World work or not?

Project overview

Hello! I am Pol and I am one of the programmers of the team.

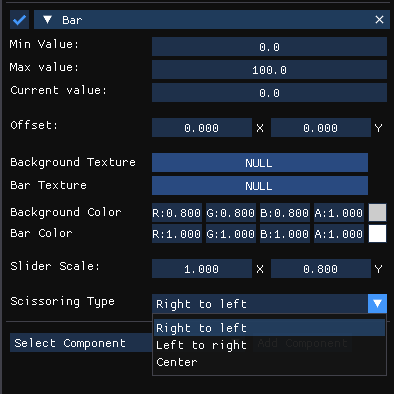
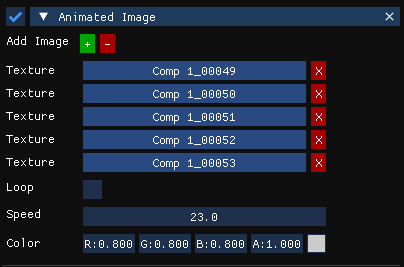
In this project I have worked from the beginning as an engine programmer and the last days I have worked in gameplay.
I worked on creating the UI system on the engine we use. I spent all these months creating and improving the system every day to offer the maximum features to the team so that they had no barriers when creating the gameplay.

UI System


Why?

I chose to do the UI system because I was the UI programmer in Project II and I also did the UI system for the video game engine subject.
This has increased my interest as it is a very important part of the game.

I started working with Alex Morales and Oriol Capdevila, who helped me with the bases, and then I worked alone on the system.

How it works?

The UI system works similarly to how Unity does, as we've taken references from it.
If you want to create a UI element at least you need a Canvas. There can be as many canvas as desired and each UI element must be assigned to one, otherwise it will not be seen.

We have implemented the basic UI elements:

  • Image
  • Button
  • Checkbox
  • Slider
  • Bar
  • Animated Image
  • Text

Canvas

The father of all

Canvas is the main element in the UI system. Every single element need a Canvas. There can be as many canvas as desired. If an element has no Canvas, it won't appear.
There are two types of Canvas:

  • Canvas 2D
  • Canvas World

The normal canvas or 2D is the traditional canvas. It allows to render the UI in a 2D mode.
In the other hand, canvas world or 3D allows you to render UI 3D, as if it was a cube for example. To do this, a billboard must be made to the camera since the elements have to be orientated to the camera each moment. There are three different types of orientation for the UI World: Screen, World and Axis.
Also, the canvas can allow or not the navigation of its childrens.

Canvas Creation

Canvas Creation

Canvas World

Canvas Inspector

Canvas Inspector

Image

Image overview

UI images are the simplest UI element.
It is formed by a texture. The image can be rescaled, moved, any texture can be applied and the color can be changed
You can also apply textures with transparencies and can be part of the UI World.

Image Creation

Image in Game

Image

Button

Button overview

It is made up of different states: Idle, Hover, Click, Pressed, Disabled. At least one texture can be assigned per state, found in the inspector. This means that each state can have more than one texture, creating animated textures, like a gif.

You can change the color of every state too.

You can also modify the velocity of the animated image of every state.

The button is one of the navigable elements in the UI. As you can see in the inspector, there is a section for the navigation. This will be explained later to understand how it works.

The same as the navigation, there is a section for the script listeners. You can attach at least one function from a script to each of the states of the button. This functions will be called when the button is in a concret state. This will be explained later to understand how it works.

By last, every navigable element have a section for its sound. This sounds will be played when you click the element or you move from one to another.

Button Animated Image Inspector

Button Animated Image

Button Navigation

Button Navigation Inspector

Button Animation Settings

Button Audio Events

Checkbox

Checkbox overview

The Checkbox is one of the navigable elements. It has different states to determinate what it should do and it has some sections similars with all the navigable elements.
First, it is made up of three textures: background, cross and tick. The Cross and the mark change each other each time the checkbox is interacted with. You can also scale the cross and tick, to fit it with the background.
Also, you can change the color of the background, tick and cross.
The shared sections are the navgiation and the script listeners. This works the same for each navigable element.

Checkbox Inspector

Checkbox Functionality

Slider

Slider overview

The slider is the last navigable element.
It is composed by two textures: background and slider dot.
The slider will move based on its value that is shown in the inspector.
You can change the slider colors and change the slider dot scale.
It has the Navigation section but it doesn't have the script listeners section. This is because the slider doesn't need to call a function. You can take the value throught script or modify the value.
Last, it has the Audio section.

Slider Inspector

Slider Functionality

Slider Color Changing

Bar

Bar overview

The bar is an element that has two textures: background and bar. The functionality of the bar is to increase the value of the texture of the bar. Commonly used for life bars, resistance bars, experience bars and much more.
You can customize the minimum and maximum value of the bar and change the current value.
Also you can change the bar scale and add an offset, to create richer bars and have more freedom at the time of adding the textures.
As the other UI elements, you can change the bar and background colors.
What makes it distinctive is the fact that you can set what type of scissoring you want to apply. The scissoring type indicates how you want the bar to increase.
We have three different types:

  • Left To Right: The bar will start from the left and will grow to the right
  • Right To Left: The bar will start from the right and will grow to the left
  • Center: The bar will start from the middle and will grow to both sides, left and right

This scissoring type can be setted using the inspector

Bar Inspector

Left To Right

Right To Left

Center

Animated Image

Animated Image overview

The animated image works as a gif should do.
There is no limit when putting more textures.
With the "+" button you add a new position to the array and with "-" you erase the last position.
You can add textures to the different positions to create a gif.
The speed of the animation can be controlled through the inspector or through scripts.
You have the possibility to set the gif as a loop or not.

Default Animated Image Inspector

Animated Image Array

Array of Textures

Add Positions to Array

Add Textures

Animated Image Functionality

Navigation

How it works?

When I started thinking about how to create the UI navigation, I had a hard time thinking how could I do that with GameObjects.

The idea of ​​creating Navigation as Unity does in one of its options, was given by my teammate Christian Martinez.

Navigation consists of each navigable element having four possible neighbors that we will move to when we interact with the gamepad.

The neighbors are: Up, Down, Left and Right.

This neighbor type is linked to gamepad movement.

This type of navigation provides much more extensive customization and allows links to be made between elements in a way that would not be possible with another system.

The UI elements that allows navigation are:

  • Button
  • Checkbox
  • Slider

Button Navigation

Navigation Inspector

Creating Navigation Inspector

Navigation In Inspector

Navigation In-Game

Scripts Listeners

How it works?

This system was possible thanks to Oriol Capdevila

There are two UI elements that can call functions from a script. These elements are:

  • Button
  • Checkbox

They can call at least one function in its state. The most common state to add a function is OnClick()

To add a function to a state, you need to add the script to the user interface element in question. Once you add it You will have in the inspector the option to add a function of that script to any of the states you want.

There is no limit of functions by state

In the inspector you will see the Functions Added and Functions to Add

Script Listener Inspector

Add Functions to State

Overall Experience


Working with such a large team has been more difficult than I expected, but it is a unique and sometimes fun experience. In addition, the pressure that falls on oneself when what has been done does not work well is very great. The UI system for me is like a child, you raise it from scratch and see how it grows, sometimes it frustrates you and other times it gives you joy. Seeing the good results that all your hard work has given is very gratifying.